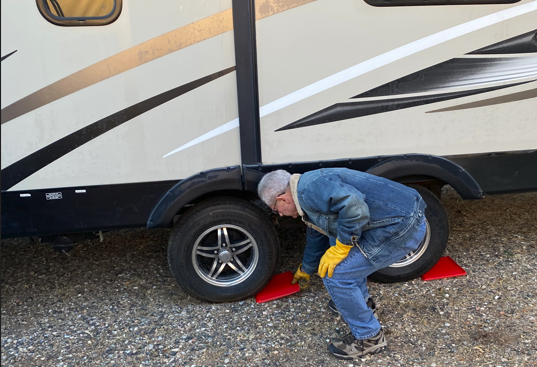
Thanksgiving week means a lot of RVers on the road: a night at the family’s place, a stop at a park on the way, maybe a driveway or a gravel lot. Every one of those stops starts the same way, with a rig that needs to stay put. Here’s a simple routine for chocking it right every time.
Two chocks are good. Four is better.
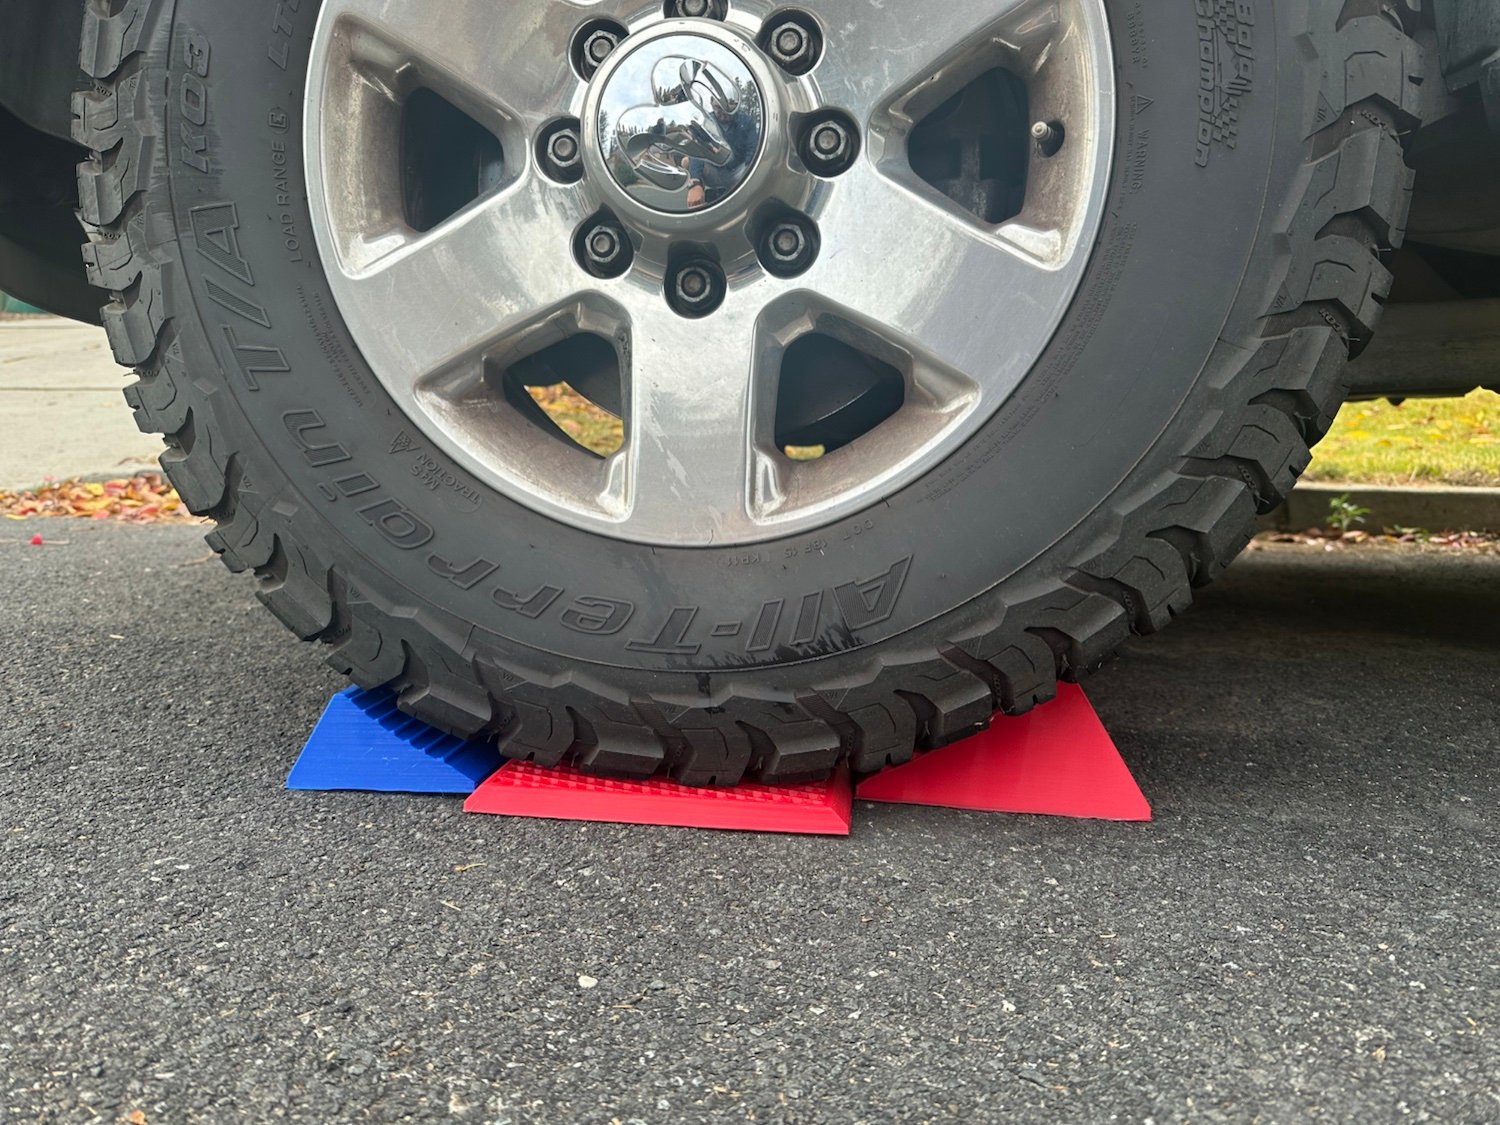
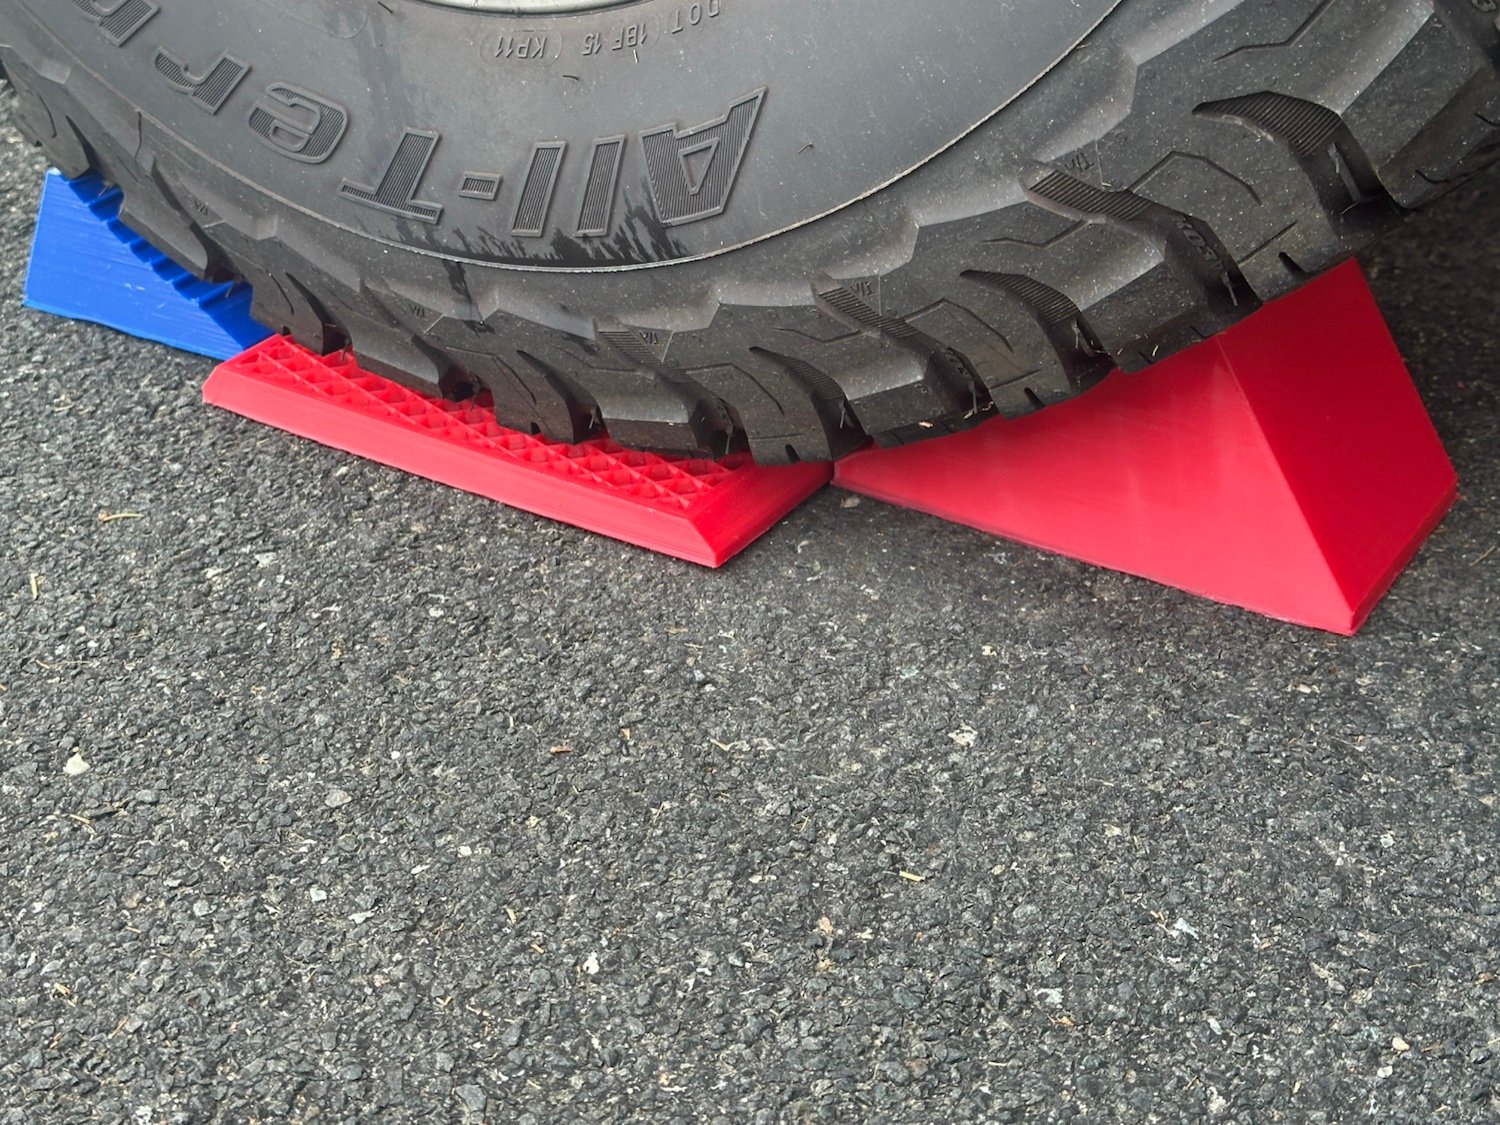
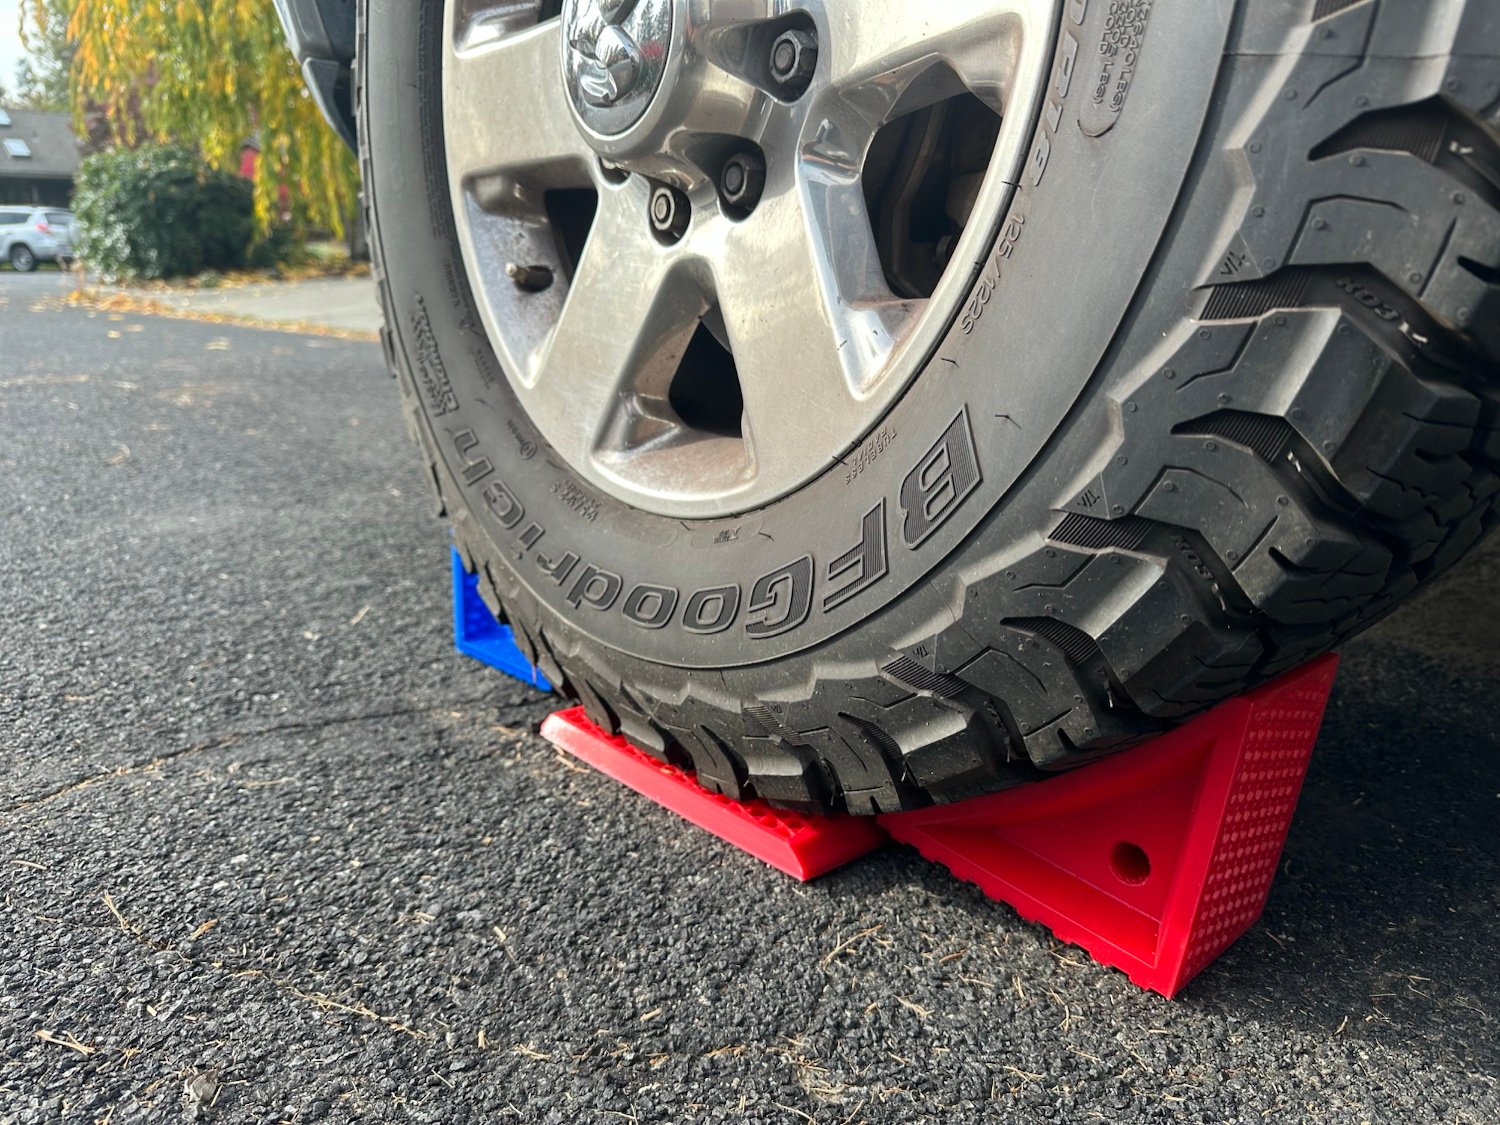
The Drive-ON 4-Chock Kit gives you a chock on both sides of the tire, on both sides of the rig:
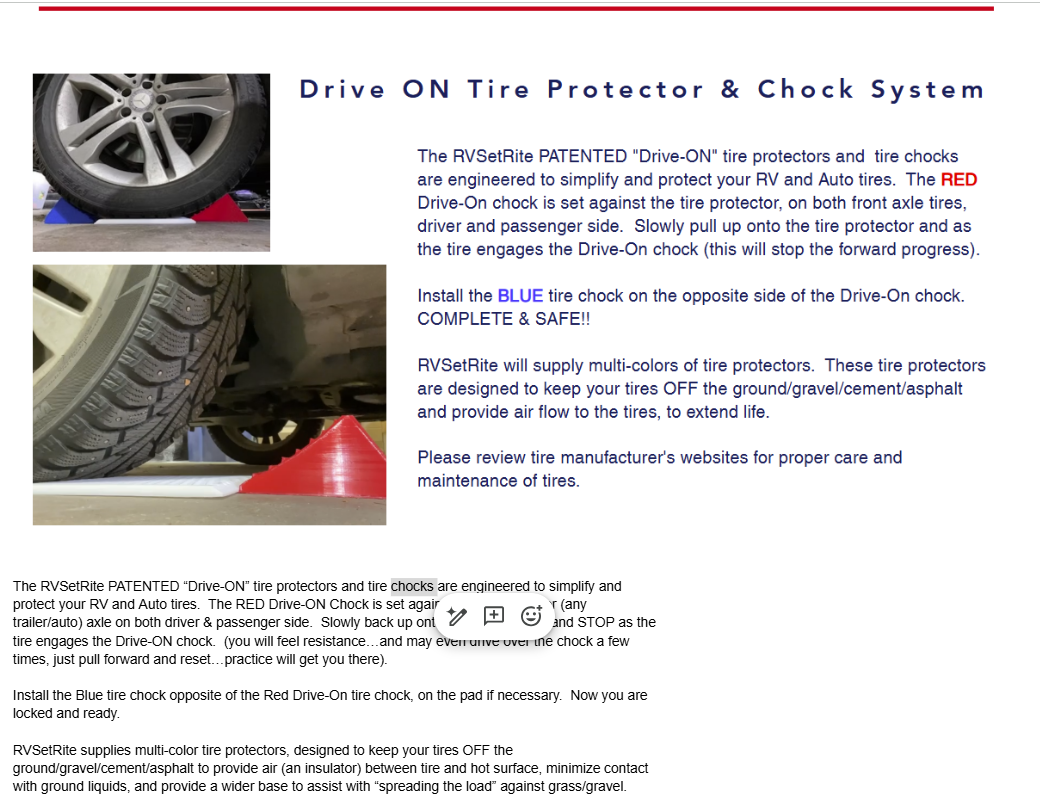
Two red rear RCHK2 stop chocks. These are the stops. You roll onto the pad and the red chock stops the tire.
Two blue front FCHK2 chocks. These go in front once you’re parked, so the tire is held front and back.
3D-printed PETG, the same material as the rest of the Drive-ON system.
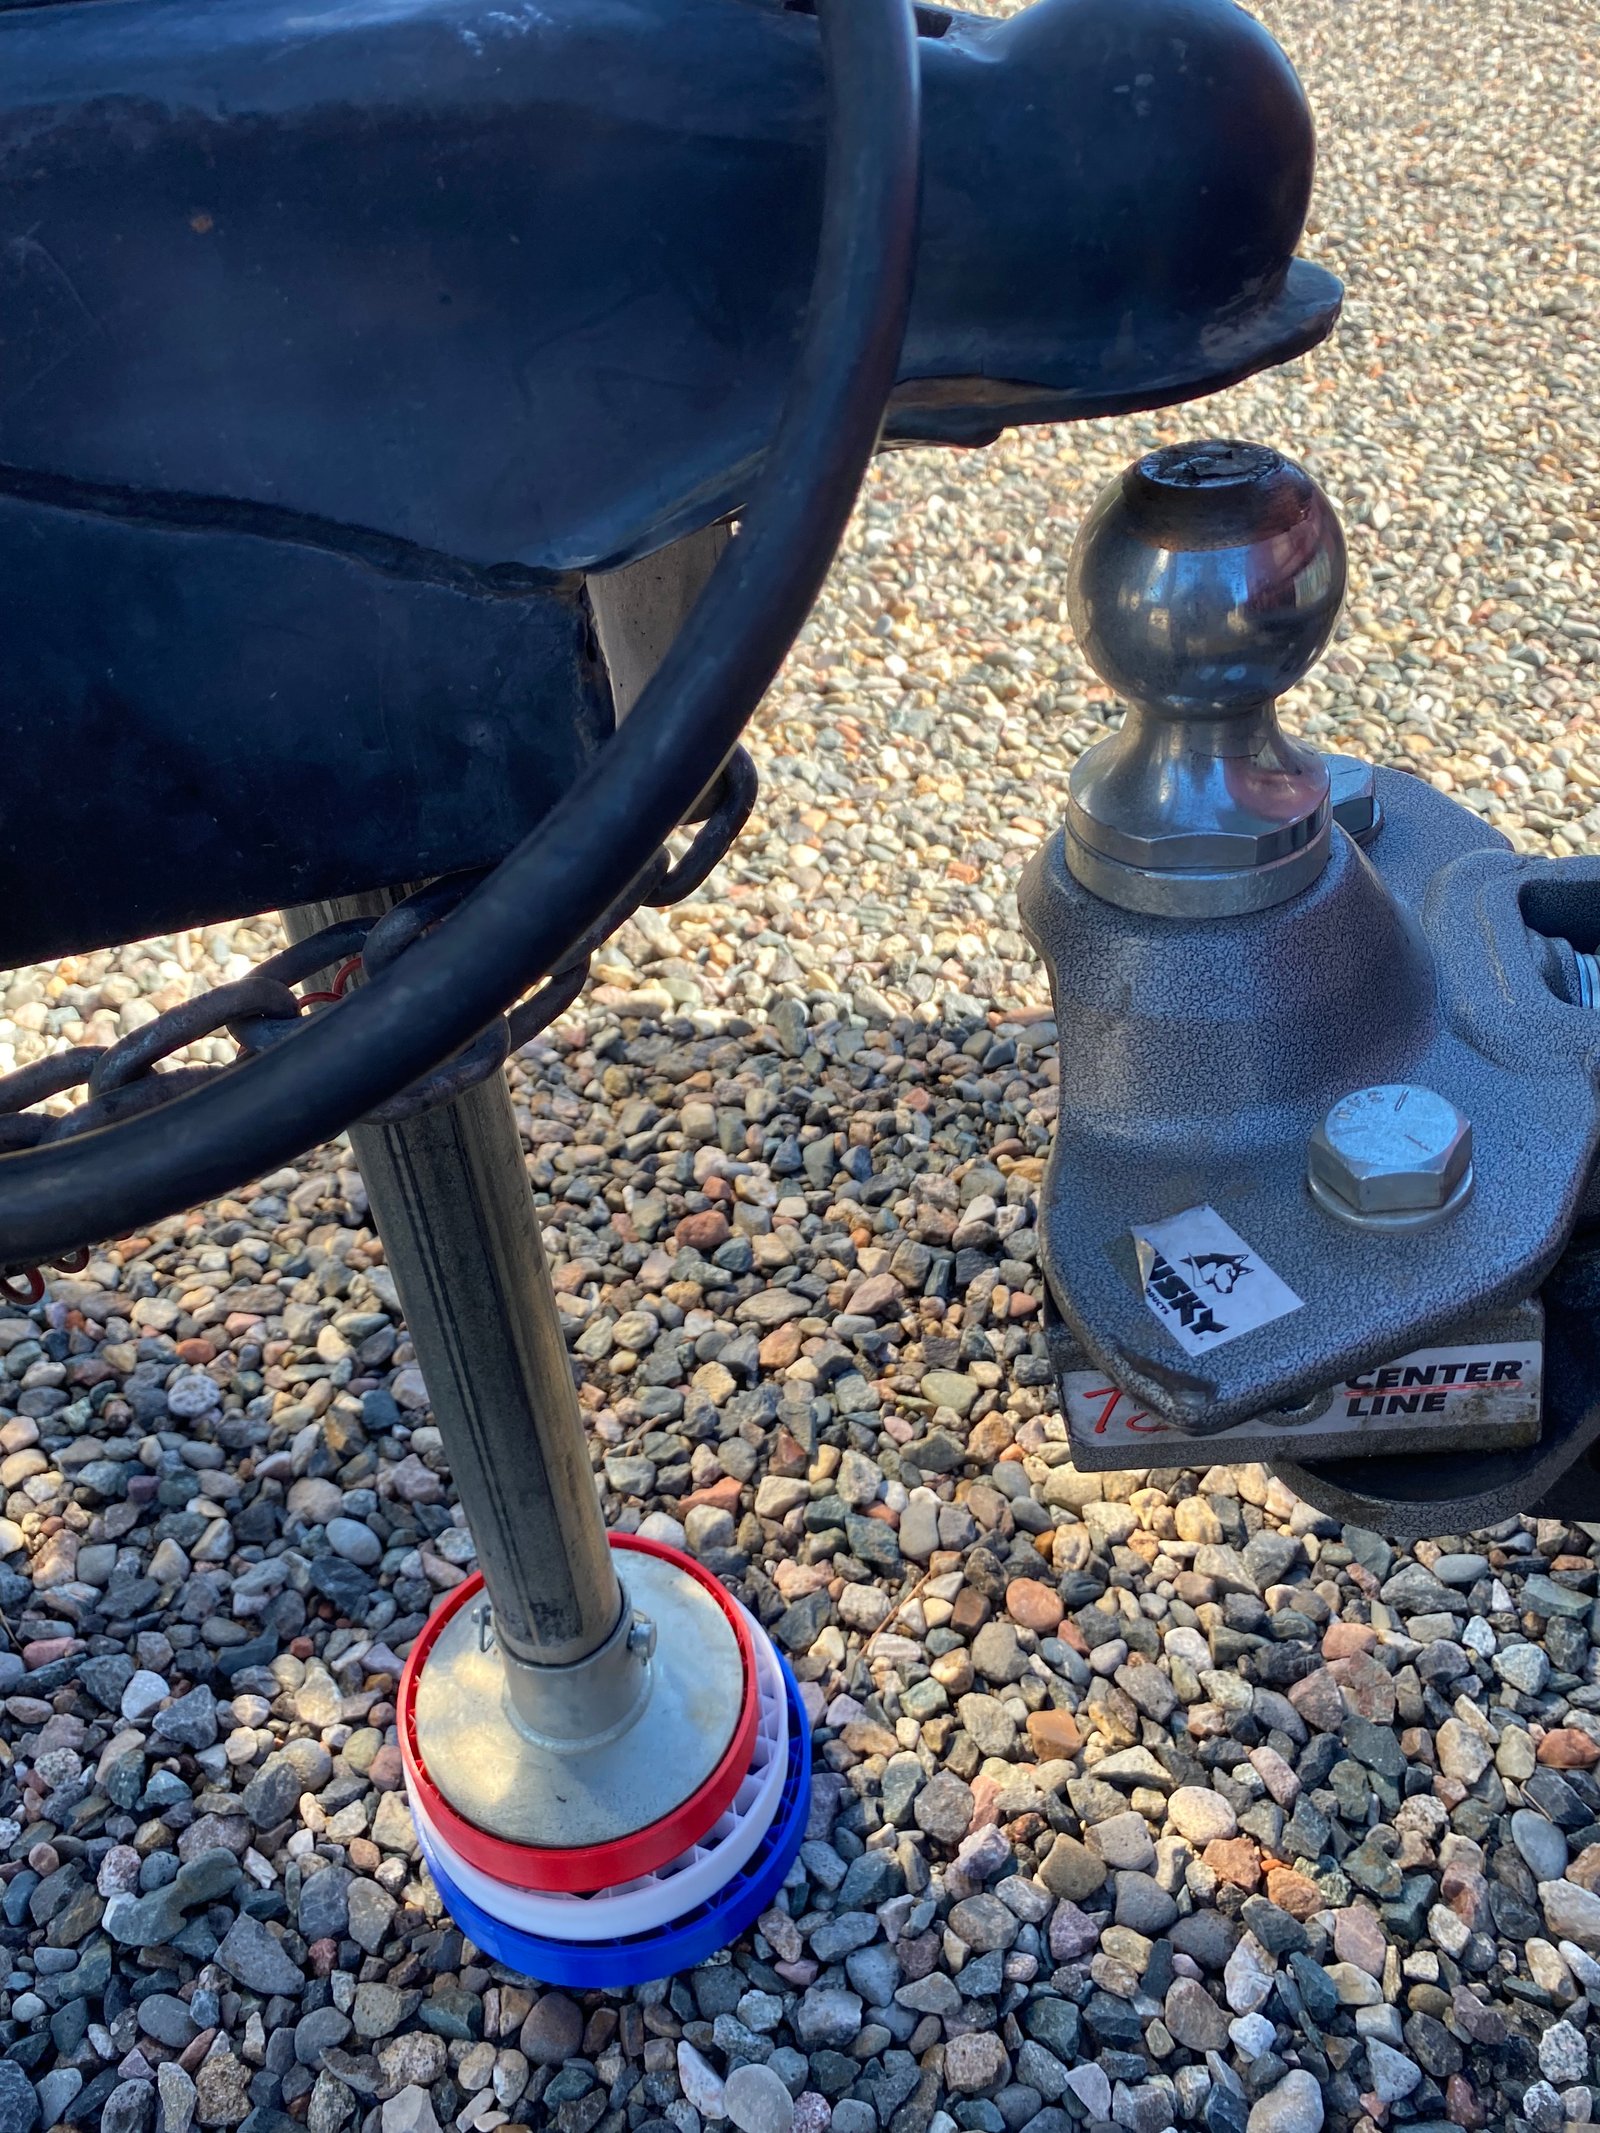
Tongue trailer? Place the red/white/blue tongue stack on firm ground under the tongue jack and lower the jack onto it. Always check that everything is stable before anyone goes in or out.
Packing list for a holiday trip
If you’re filling in what’s missing before you leave, these are the pieces that go with the chocks:
Drive-ON 4-Chock Kit — $89
1″ Tire Protector (TP1) — $25 each, one per tire
Heavy Duty Tire Protectors, set of 4 — $100, built for Class A motorhomes, 5th wheels and trailers
10″ Round Stabilizer Pads, set of 4 — $75
Or a full RIG Kit: 5th Wheel $250, Tongue Trailer $290, MotorHome $300
Shopping for an RVer?
A chock kit is an easy gift for the RVer who already has everything but still digs blocks out of the bay at every stop. Not sure what fits their rig? Our Order Here page asks a few questions and builds the right Drive-ON set-up kit.
Shopping for an RVer this season, or setting up your own rig for the next trip? Every RVSetRite RIG Kit is built around the same Drive-ON idea: lay the pads, drive on, and stop on the red chock. The only question is which kit matches the rig.
Tongue Trailer Base Rig Kit — $290
13 Drive-ON pieces:
4 tire protectors
4 10-inch stabilizer pads
2 red rear chocks and 2 blue front chocks
1 TT75 7.5-inch tongue stack (red, white and blue) for the tongue jack
The tongue stack is the piece that makes this kit tongue-trailer only. It is not for motorhomes or 5th wheels.
5th Wheel Base Rig Kit — $250
12 Drive-ON pieces:
4 tire protectors
4 10-inch stabilizer pads
2 red rear chocks and 2 blue front chocks
MotorHome Base Rig Kit — $300
14 Drive-ON pieces:
6 tire protectors
4 10-inch stabilizer pads
2 red rear chocks and 2 blue front chocks
Just need chocks?
The Drive-ON 4-Chock Kit is $89: two red rear RCHK2 stop chocks and two blue front FCHK2 chocks. Drive on and stop on the rear chock.
Same set-up, every kit
Stop 1 to 2 feet short of your spot.
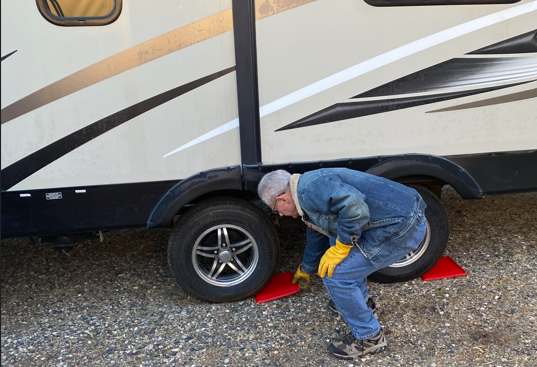
Lay a tire protector behind each tire, with a red stop chock at the end of the pad.
Drive on slowly until the red chock stops the tire on the pad.
Set a blue chock in front of the tire.
Put a 10-inch pad under each stabilizer.
Every piece is 3D-printed PETG. Shipping is a flat $9, and free on orders over $150, so every RIG Kit ships free.
When a car sits for months, each tire rests on the same patch of garage concrete — or, if you park outside, in whatever water collects under it. Tire makers and the U.S. tire industry recommend a simple precaution: keep stored tires in a clean, dry place, and raise them off the floor so they are not sitting in moisture. Michelin notes that bare concrete can draw moisture. Yokohama warns that rain and moisture can deteriorate the rubber and rust the steel cord inside the tire.
That is the job of the RVSetRite Auto Storage Kit. Each tire sits on a high-strength 3D-printed tire pad, which keeps the rubber off the concrete and out of standing water.
Why off the concrete, and out of the water
Concrete slabs in a garage or on a driveway can stay damp. Water wicks through the slab and sits at the surface, so a tire left there for a season stays in long, close contact with that moisture.
A common concern is that chemicals in the concrete leach into the rubber and break it down microscopically. The strongest, most consistent guidance from tire makers is about moisture, not a dramatic chemical attack from the slab itself. Modern tires use synthetic rubber blends and protective additives, and they are more resistant than older natural-rubber tires. Even so, official advice has not changed: store tires off the floor, and keep them dry.
Here is what that moisture can do, in plain terms. Prolonged wet contact can slowly affect the rubber at the surface. Protective compounds mixed into the tire — the additives that help the rubber age more slowly — can leach into water over time. If moisture works into the tire, it can reach the steel belts and cords and cause rust. None of this happens overnight, and a pad is not a magic shield. Lifting the tire off the damp slab, or out of a puddle, helps protect the rubber during a long sit.
If the car is parked outside, the same pads lift the tires out of standing water so the rubber is not soaking all winter.
What’s in the Auto Storage Kit
The kit is sold on rvsetrite.com for $89 and includes everything you need for one car — pads and chocks together:
4 Auto Tire Protectors (ATP) — one high-strength 3D-printed pad for each tire
1 ARCHK rear chock
1 AFCHK front chock
The Auto Tire Protectors are the car version of RVSetRite’s Drive-ON pads. They are thinner than the 1-inch RV tire protector (TP1), so they sit lower under a car tire and are a better fit in a garage or storage stall. Like the rest of the RVSetRite line, they are 3D-printed in PETG. The whole kit is lightweight, easy to carry to the parking spot, and easy to pick up when winter is over.
Hold the car without leaving the parking brake set
The red ARCHK goes at the rear of the tire to stop the car. The blue AFCHK goes at the front. Together they hold the car in place while it sits, so you do not need to set or compress the parking brake for the storage season. Leaving a parking brake clamped for months can strain the mechanism or leave it sticky when you come back. The chocks are a simple way to keep the car from rolling without relying on the brake.
Set it down and leave it for the season
Place one Auto Tire Protector under each tire so the tire sits on the high-strength 3D-printed pad, not on the concrete or in standing water. Set the rear chock behind the tire and the front chock in front. Once the car is on the pads and the chocks are in place, you can leave the setup for the storage season.
If you already know RVSetRite from the Drive-ON RV kits, this is the automobile version of that idea — same 3D-printed PETG construction, with thinner pads suited to a car tire. The Auto Storage Kit is available on the RVSetRite website.
Ready to park the car for winter? Shop the Auto Storage Kit on rvsetrite.com. Questions? RVSetRite@gmail.com or 509.879.9699. Ships from Spokane, WA.
Sources
Michelin, “Storing my tires.” Bare concrete can draw moisture; raise outdoor tires off the ground to limit moisture from below. Michelin Canada; Michelin USA.
U.S. Tire Manufacturers Association, Tire Information Service Bulletin 23, November 2024. Store tires raised off the surface to minimize moisture; do not store them in a wet area. USTMA TISB 23 (PDF).
Yokohama, “Tire Storage.” Rain and moisture can deteriorate rubber and rust the steel cord; do not store tires directly on the ground. Yokohama Tire Storage.
Bridgestone, tire storage FAQ. Store indoors in a cool, dry place; do not let water collect inside the tire. Bridgestone FAQs.
ISO 2230, Rubber products — Guidelines for storage. Avoid moist conditions and condensation; do not leave rubber in contact with liquids during storage. ISO 2230.
Not every rig heads south. If your RV, trailer or car is parked for the winter, it’s going to sit on the same spot of ground for months. That’s a long time for a tire to rest right on dirt, asphalt or concrete.
Give every tire some separation
A Drive-ON tire protector puts a pad between the tire and the ground. One pad per tire adds separation from the ground to help preserve tire life, whether the rig sits for a weekend or a whole season.
RVs and trailers: Drive-ON Tire Protectors, $25 each, or a set of 4 for $120.
Cars in the garage: Automobile Tire Protectors, a set of 4 for $49, lift tires off the garage floor. They help keep tire chemicals from leaching into the concrete and stop the concrete from pulling moisture and chemicals from the tires. Pair them with the Auto Tire Chock set of 2 for $19.
Set it once, leave it all winter
Stop 1 to 2 feet short of your storage spot.
Lay a tire protector behind every tire.
Set a red stop chock at the end of each pad, driver and passenger side.
Drive on slowly until the red chock stops the tire on the pad.
Place a blue chock in front of the tire, resting against the red.
Already have a RIG Kit?
The same pads and red/blue chocks you use at camp work as your winter storage setup. Every RIG Kit includes 2 red/blue chock sets. Need pads for a second vehicle? Shipping is a flat $9 per order and free over $150.
Every stop starts the same way. You open the bay, drag out the wood blocks, carry them around the rig one armload at a time, and hope none of them cracked since the last site. There’s a lighter way to set up, and it lasts a lot longer.
Saving weight
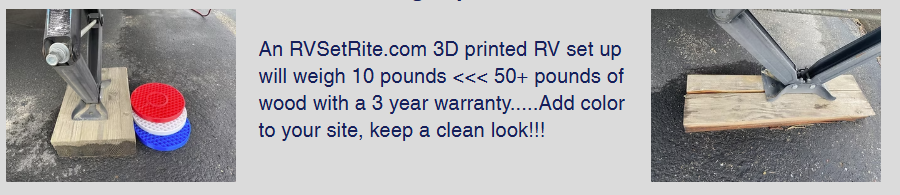
A typical stack of leveling and jack blocks easily tops 50 pounds, and wet wood weighs even more. A full RVSetRite set up weighs about 10 pounds. That means less lifting and bending at every campsite, fewer trips around the rig, and less weight riding in your storage bay mile after mile. For snowbirds and full-timers who set up dozens of times a season, those pounds add up fast.
Long-term life: why wood splits
Wood is a sponge. It soaks up rain and ground moisture, swells, dries out in the sun and checks along the grain. Put a jack or stabilizer on it and those cracks turn into splits. Leave it out on a long stay and it starts to rot. Sooner or later you’re back at the hardware store buying more lumber.
RVSetRite parts are 3D printed in PETG, a tough, UV-protected plastic that doesn’t absorb water. It won’t swell, split or rot, and mud rinses right off with a hose. One customer put it simply: “Lighter than wood, won’t split like wood….just hose off if they get dirty.” Another wrote, “Have been using these for 10 months, still look new!”
Backed for 3 years
Every RVSetRite set up carries a 3-year warranty, and replacements ship within 48 hours.
Build your set up
Tire protectors, color-coded chocks, tongue jack pads and 10″ stabilizer bases are available for tongue trailers, 5th wheels and motorhomes. Shop at rvsetrite.com, or reach us at RVSetRite@gmail.com or 509.879.9699. Ships from Spokane, WA.
Every RVer knows the routine: dig the wood blocks out of the bay, find out they’re still damp from the last stop, and hope none of them split when the jack comes down. There’s a lighter, cleaner way to set up.
What’s wrong with wood
It’s heavy, and heavier when wet. A pile of blocks is a lot to carry around the rig at every stop.
It splits and rots. Left out on a long stay, wood swells and breaks down.
It’s messy. Mud and grit soak in, and it all rides home in your storage bay.
Cheap plastic isn’t much better. One of our customers replaced the standard yellow rectangles that “fade and crack in 3-6 months.”
What Drive-ON gives you instead
Light. Drive-ON parts are 3D printed in PETG, about 10 lb for a full kit.
Strong and durable. Engineered by family members and tested on our own RVs over the past few years.
UV-protected. Built to sit in the sun without fading out.
Hose-off clean. Dirty after a muddy site? Rinse and pack.
Color-coded. Tire pad behind the tire, red stop chock at the end of the pad, blue chock in front. Tongue trailers stack the 7.5″ tongue pads blue, white, red under the jack. 10″ round bases go under stabilizers to spread the load on soft ground.
3-year warranty. Replacements ship within 48 hours.
From our customers
“Lighter than wood, won’t split like wood….just hose off if they get dirty.”
“Have been using these for 10 months, still look new!”
Last chance for the Snowbirds special
Get 25% off through Oct 31 with code SNOWBIRDS25 at rvsetrite.com or on Amazon.
Build a kit for your motorhome, 5th wheel or tongue trailer on Order Here. Questions? RVSetRite@gmail.com or 509.879.9699. Ships from Spokane, WA.
Heading south for the winter? Your rig may sit in one spot for weeks or months, on gravel, sand or soft ground. The first hour at your site sets the tone for the whole stay.
The Drive-ON long-stay setup
Stop the rig 1 foot short of your final spot.
Lay a tire pad behind each tire.
Set a red stop chock at the end of each tire pad, left and right.
Drive on, then place a blue chock in front of each tire, snug against the red.
Tongue trailers only: stack the 7.5″ tongue pads (blue on the ground, white in the middle, red on top) under the tongue jack.
Put a 10″ round base under each stabilizer or leveler to spread the load on soft ground.
Why PETG beats wood for a long stay
Wood left out all winter swells, splits and rots. Drive-ON parts are UV-protected PETG. They’re light enough for one person to carry, they hose off clean when you pack up, and they come with a 3-year warranty.
Before you leave
Count your pads, chocks and bases for your rig: motorhome, 5th wheel or tongue trailer.
Pack them where you can reach them first at the new site.
Snowbirds special
Get 25% off through Oct 31 with code SNOWBIRDS25 at rvsetrite.com or on Amazon.
Build your kit on Order Here. Questions? RVSetRite@gmail.com or 509.879.9699.
Getting the pads and chocks in the right order makes Drive-ON simple on every setup. This post walks through proper tire pad placement and how the red stop chock locks the system—the same sequence shown in the setup video.
WHAT YOU NEED
• Drive-ON tire protectors / pads (one behind every tire)
• Red stop chocks (rear/stop)
• Blue front chocks (seat against the red after the tire rolls on)
• A clear path to roll onto the pads cleanly
STEP 1 — STOP SHORT
Position the rig about 1–2 feet short of the final site spot. That gap is where the pads and red chocks go before you finish rolling into place.
STEP 2 — PADS BEHIND EVERY TIRE
Lay a Drive-ON tire pad behind every tire that will carry load. Pads protect tires and give a clean drive-on surface—don’t skip a tire.
STEP 3 — RED STOP CHOCK AT THE END
Place the red stop chock at the far end of each pad path. Red is the stop: it tells the tire where to finish and keeps the system from rolling through.
STEP 4 — BLUE CHOCK IN FRONT
After the tire is on the pad against the red stop, set the blue chock in front of the tire, tight against the red side as shown in the video. Red = stop/rear; blue = front.
STEP 5 — FINISH THE SET-UP
With tires locked on the Drive-ON path, continue with stabilizer/leveler bases and (tongue trailers only) 7.5″ tongue stackables. Tire pads + chocks first; jacks second.
WHY THIS ORDER MATTERS
• Pads first: tires never sit on sharp gravel or soft ground alone
• Red at the pad end: a hard stop you can see
• Blue in front: the tire is boxed in for a stable stay
READY FOR A KIT SIZED TO YOUR RIG?
Answer a few questions on Order Here and we’ll calculate the right pad and chock quantities for your motorhome, 5th wheel, or tongue trailer.
We decided it was time to perform field testing and installs, with our RV neighbors.
Our neighbors, a couple who kept asking where all these parts kept coming from, and we told them these were products that we were still finalizing….well, last Friday we took them an entire set over for their Class A Motorhome. We gave them a kit (MH2A-4S) A set of (6) tire protectors, (2) Drive-On Chock sets, and (4) 10″ Round stabilizer pads. They were ecstatic!!! And, they actually did the install all by themselves, in 10 minutes. John lifted the motorhome using their jacks, left side then right side and simply slid the tire protectors under the tires. He then added the tire chocks and repeated for the right side. Once tires were chocked, he lifted the stabilizer/leveling jacks and slid the 10″ rounds directly under. Voila….all set!!! But that wasn’t all, Jackie decided she wanted some of the 3.5″ rounds and ovals to put under her chairs and tables…..a happy customer!
We sold (3) sets to other neighbors who came over to watch the installation…..a fun night talking about their set ups and where all these parts could be used….a celebratory cooler helped!